회로도

ESPAsyncWebServer.h 라이브러리를 추가 합니다.
RandomNerdTutorials.com/esp32-cam-take-photo-display-web-server/
소스에서 #include "Arduino.h" 없다면 추가 합니다.
컴파일 과정에서 ESPAsyncWebServer.h 없다는 에러는 다음에서 다운받아 추가 합니다.
github.com/me-no-dev/ESPAsyncWebServer
추가방법:

#include "WiFi.h"
#include "esp_camera.h"
#include "esp_timer.h"
#include "img_converters.h"
#include "Arduino.h"
#include "soc/soc.h" // Disable brownour problems
#include "soc/rtc_cntl_reg.h" // Disable brownour problems
#include "driver/rtc_io.h"
#include <ESPAsyncWebServer.h>
#include <StringArray.h>
#include <SPIFFS.h>
#include <FS.h>
#include <Arduino.h>
// Replace with your network credentials
const char* ssid = "iptime";
const char* password = "12345678";
// Create AsyncWebServer object on port 80
AsyncWebServer server(80);
boolean takeNewPhoto = false;
// Photo File Name to save in SPIFFS
#define FILE_PHOTO "/photo.jpg"
//esp32-cam 모듈에 맞게 설정해야 합니다.
// OV2640 camera module pins (CAMERA_MODEL_AI_THINKER)
#define PWDN_GPIO_NUM 32
#define RESET_GPIO_NUM -1
#define XCLK_GPIO_NUM 0
#define SIOD_GPIO_NUM 26
#define SIOC_GPIO_NUM 27
#define Y9_GPIO_NUM 35
#define Y8_GPIO_NUM 34
#define Y7_GPIO_NUM 39
#define Y6_GPIO_NUM 36
#define Y5_GPIO_NUM 21
#define Y4_GPIO_NUM 19
#define Y3_GPIO_NUM 18
#define Y2_GPIO_NUM 5
#define VSYNC_GPIO_NUM 25
#define HREF_GPIO_NUM 23
#define PCLK_GPIO_NUM 22
const char index_html[] PROGMEM = R"rawliteral(
<!DOCTYPE HTML><html>
<head>
<meta name="viewport" content="width=device-width, initial-scale=1">
<style>
body { text-align:center; }
.vert { margin-bottom: 10%; }
.hori{ margin-bottom: 0%; }
</style>
</head>
<body>
<div id="container">
<h2>ESP32-CAM Last Photo</h2>
<p>It might take more than 5 seconds to capture a photo.</p>
<p>
<button onclick="rotatePhoto();">ROTATE</button>
<button onclick="capturePhoto()">CAPTURE PHOTO</button>
<button onclick="location.reload();">REFRESH PAGE</button>
</p>
</div>
<div><img src="saved-photo" id="photo" width="70%"></div>
</body>
<script>
var deg = 0;
function capturePhoto() {
var xhr = new XMLHttpRequest();
xhr.open('GET', "/capture", true);
xhr.send();
}
function rotatePhoto() {
var img = document.getElementById("photo");
deg += 90;
if(isOdd(deg/90)){ document.getElementById("container").className = "vert"; }
else{ document.getElementById("container").className = "hori"; }
img.style.transform = "rotate(" + deg + "deg)";
}
function isOdd(n) { return Math.abs(n % 2) == 1; }
</script>
</html>)rawliteral";
void setup() {
// Serial port for debugging purposes
Serial.begin(115200);
// Connect to Wi-Fi
WiFi.begin(ssid, password);
while (WiFi.status() != WL_CONNECTED) {
delay(500);
Serial.println("Connecting to WiFi...");
}
if (!SPIFFS.begin(true)) {
Serial.println("An Error has occurred while mounting SPIFFS");
ESP.restart();
}
else {
delay(500);
Serial.println("SPIFFS mounted successfully");
}
// Print ESP32 Local IP Address
Serial.print("IP Address: http://");
Serial.println(WiFi.localIP());
// Turn-off the 'brownout detector'
WRITE_PERI_REG(RTC_CNTL_BROWN_OUT_REG, 0);
// OV2640 camera module
camera_config_t config;
config.ledc_channel = LEDC_CHANNEL_0;
config.ledc_timer = LEDC_TIMER_0;
config.pin_d0 = Y2_GPIO_NUM;
config.pin_d1 = Y3_GPIO_NUM;
config.pin_d2 = Y4_GPIO_NUM;
config.pin_d3 = Y5_GPIO_NUM;
config.pin_d4 = Y6_GPIO_NUM;
config.pin_d5 = Y7_GPIO_NUM;
config.pin_d6 = Y8_GPIO_NUM;
config.pin_d7 = Y9_GPIO_NUM;
config.pin_xclk = XCLK_GPIO_NUM;
config.pin_pclk = PCLK_GPIO_NUM;
config.pin_vsync = VSYNC_GPIO_NUM;
config.pin_href = HREF_GPIO_NUM;
config.pin_sscb_sda = SIOD_GPIO_NUM;
config.pin_sscb_scl = SIOC_GPIO_NUM;
config.pin_pwdn = PWDN_GPIO_NUM;
config.pin_reset = RESET_GPIO_NUM;
config.xclk_freq_hz = 20000000;
config.pixel_format = PIXFORMAT_JPEG;
if (psramFound()) {
config.frame_size = FRAMESIZE_UXGA;
config.jpeg_quality = 10;
config.fb_count = 2;
} else {
config.frame_size = FRAMESIZE_SVGA;
config.jpeg_quality = 12;
config.fb_count = 1;
}
// Camera init
esp_err_t err = esp_camera_init(&config);
if (err != ESP_OK) {
Serial.printf("Camera init failed with error 0x%x", err);
ESP.restart();
}
// Route for root / web page
server.on("/", HTTP_GET, [](AsyncWebServerRequest * request) {
request->send_P(200, "text/html", index_html);
});
server.on("/capture", HTTP_GET, [](AsyncWebServerRequest * request) {
takeNewPhoto = true;
request->send_P(200, "text/plain", "Taking Photo");
});
server.on("/saved-photo", HTTP_GET, [](AsyncWebServerRequest * request) {
request->send(SPIFFS, FILE_PHOTO, "image/jpg", false);
});
// Start server
server.begin();
}
void loop() {
if (takeNewPhoto) {
capturePhotoSaveSpiffs();
takeNewPhoto = false;
}
delay(1);
}
// Check if photo capture was successful
bool checkPhoto( fs::FS &fs ) {
File f_pic = fs.open( FILE_PHOTO );
unsigned int pic_sz = f_pic.size();
return ( pic_sz > 100 );
}
// Capture Photo and Save it to SPIFFS
void capturePhotoSaveSpiffs( void ) {
camera_fb_t * fb = NULL; // pointer
bool ok = 0; // Boolean indicating if the picture has been taken correctly
do {
// Take a photo with the camera
Serial.println("Taking a photo...");
fb = esp_camera_fb_get();
if (!fb) {
Serial.println("Camera capture failed");
return;
}
// Photo file name
Serial.printf("Picture file name: %s\n", FILE_PHOTO);
File file = SPIFFS.open(FILE_PHOTO, FILE_WRITE);
// Insert the data in the photo file
if (!file) {
Serial.println("Failed to open file in writing mode");
}
else {
file.write(fb->buf, fb->len); // payload (image), payload length
Serial.print("The picture has been saved in ");
Serial.print(FILE_PHOTO);
Serial.print(" - Size: ");
Serial.print(file.size());
Serial.println(" bytes");
}
// Close the file
file.close();
esp_camera_fb_return(fb);
// check if file has been correctly saved in SPIFFS
ok = checkPhoto(SPIFFS);
} while ( !ok );
}
업로드합니다.
순서 1: 모니터에 IP가 출력됩니다.

순서 3: 브라우저에 접속합니다.
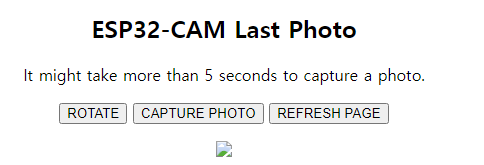
순서 4: CAPTURE PHOTO를 클릭 후 REFRESHPAGE를 실행하면 이미지가 출력됩니다.
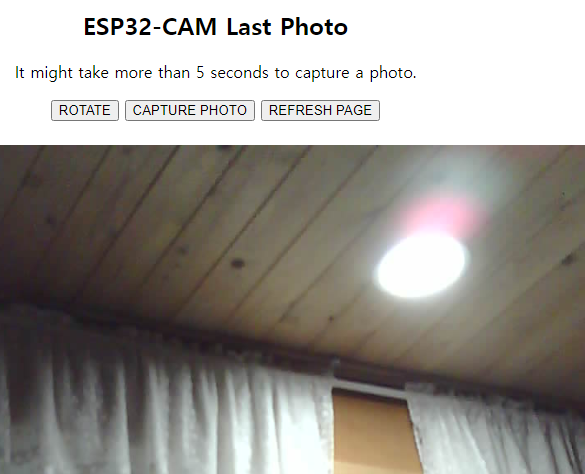
순서 5: 이미지를 회전해봅니다.(ROTATE).
'코딩 놀이' 카테고리의 다른 글
| ESP32-CAM, 이미지 메일전송-[5] (0) | 2021.04.05 |
|---|---|
| esp32-cam SD에 이미지 저장-[4] (0) | 2021.04.04 |
| ESP32_CAM SD 녹화 -[2] (0) | 2021.04.04 |
| ESP32 -cam 영상보기 -[1] (0) | 2021.04.04 |
| Ethernet shileds (0) | 2021.04.02 |


