사진을 찍고, 이미지를 SD카드에 저장합니다.
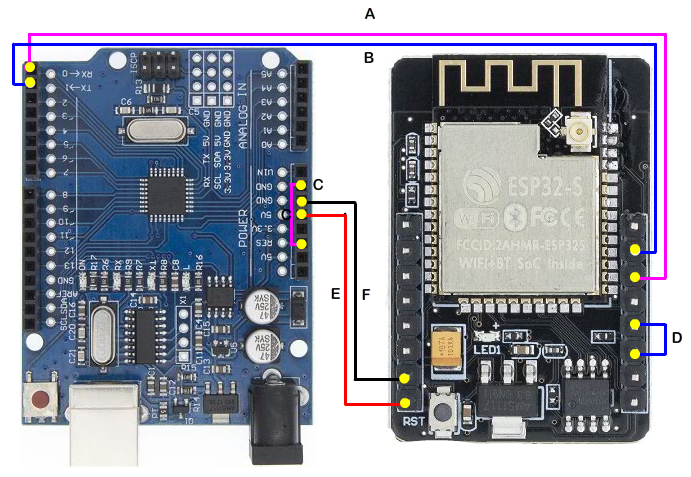
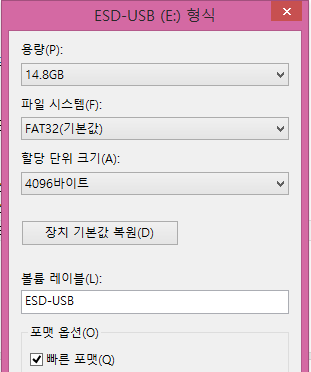
순서 1: 포멧 후 SD카드를 슬롯에 장착합니다.
순서 2: 소스를 컴파일 합니다.
참조 소스: https://RandomNerdTutorials.com/esp32-cam-take-photo-save-microsd-card
순서 3 : #include "dl_lib.h" 라이브러리 파일 추가 되지 않을 경우에러가 발생 할 경우에는 소스 파일 폴더에 저장합니다.

순서 4: 업로드 합니다.
#include "esp_camera.h"
#include "esp_timer.h"
#include "img_converters.h"
#include "Arduino.h"
#include "fb_gfx.h"
#include "fd_forward.h"
#include "fr_forward.h"
#include "FS.h" // SD Card ESP32
#include "SD_MMC.h" // SD Card ESP32
#include "soc/soc.h" // Disable brownour problems
#include "soc/rtc_cntl_reg.h" // Disable brownour problems
#include "dl_lib.h"
#include "driver/rtc_io.h"
#include <EEPROM.h> // read and write from flash memory
// define the number of bytes you want to access
#define EEPROM_SIZE 1
// Pin definition for CAMERA_MODEL_AI_THINKER
#define PWDN_GPIO_NUM 32
#define RESET_GPIO_NUM -1
#define XCLK_GPIO_NUM 0
#define SIOD_GPIO_NUM 26
#define SIOC_GPIO_NUM 27
#define Y9_GPIO_NUM 35
#define Y8_GPIO_NUM 34
#define Y7_GPIO_NUM 39
#define Y6_GPIO_NUM 36
#define Y5_GPIO_NUM 21
#define Y4_GPIO_NUM 19
#define Y3_GPIO_NUM 18
#define Y2_GPIO_NUM 5
#define VSYNC_GPIO_NUM 25
#define HREF_GPIO_NUM 23
#define PCLK_GPIO_NUM 22
int pictureNumber = 0;
void setup() {
WRITE_PERI_REG(RTC_CNTL_BROWN_OUT_REG, 0); //disable brownout detector
Serial.begin(115200);
//Serial.setDebugOutput(true);
//Serial.println();
camera_config_t config;
config.ledc_channel = LEDC_CHANNEL_0;
config.ledc_timer = LEDC_TIMER_0;
config.pin_d0 = Y2_GPIO_NUM;
config.pin_d1 = Y3_GPIO_NUM;
config.pin_d2 = Y4_GPIO_NUM;
config.pin_d3 = Y5_GPIO_NUM;
config.pin_d4 = Y6_GPIO_NUM;
config.pin_d5 = Y7_GPIO_NUM;
config.pin_d6 = Y8_GPIO_NUM;
config.pin_d7 = Y9_GPIO_NUM;
config.pin_xclk = XCLK_GPIO_NUM;
config.pin_pclk = PCLK_GPIO_NUM;
config.pin_vsync = VSYNC_GPIO_NUM;
config.pin_href = HREF_GPIO_NUM;
config.pin_sscb_sda = SIOD_GPIO_NUM;
config.pin_sscb_scl = SIOC_GPIO_NUM;
config.pin_pwdn = PWDN_GPIO_NUM;
config.pin_reset = RESET_GPIO_NUM;
config.xclk_freq_hz = 20000000;
config.pixel_format = PIXFORMAT_JPEG;
if(psramFound()){
config.frame_size = FRAMESIZE_UXGA; // FRAMESIZE_ + QVGA|CIF|VGA|SVGA|XGA|SXGA|UXGA
config.jpeg_quality = 10;
config.fb_count = 2;
} else {
config.frame_size = FRAMESIZE_SVGA;
config.jpeg_quality = 12;
config.fb_count = 1;
}
// Init Camera
esp_err_t err = esp_camera_init(&config);
if (err != ESP_OK) {
Serial.printf("Camera init failed with error 0x%x", err);
return;
}
//Serial.println("Starting SD Card");
if(!SD_MMC.begin()){
Serial.println("SD Card Mount Failed");
return;
}
uint8_t cardType = SD_MMC.cardType();
if(cardType == CARD_NONE){
Serial.println("No SD Card attached");
return;
}
camera_fb_t * fb = NULL;
// Take Picture with Camera
fb = esp_camera_fb_get();
if(!fb) {
Serial.println("Camera capture failed");
return;
}
// initialize EEPROM with predefined size
EEPROM.begin(EEPROM_SIZE);
pictureNumber = EEPROM.read(0) + 1;
// Path where new picture will be saved in SD Card
String path = "/picture" + String(pictureNumber) +".jpg";
fs::FS &fs = SD_MMC;
Serial.printf("Picture file name: %s\n", path.c_str());
File file = fs.open(path.c_str(), FILE_WRITE);
if(!file){
Serial.println("Failed to open file in writing mode");
}
else {
file.write(fb->buf, fb->len); // payload (image), payload length
Serial.printf("Saved file to path: %s\n", path.c_str());
EEPROM.write(0, pictureNumber);
EEPROM.commit();
}
file.close();
esp_camera_fb_return(fb);
// Turns off the ESP32-CAM white on-board LED (flash) connected to GPIO 4
pinMode(4, OUTPUT);
digitalWrite(4, LOW);
rtc_gpio_hold_en(GPIO_NUM_4);
delay(2000);
Serial.println("Going to sleep now");
delay(2000);
esp_deep_sleep_start();
Serial.println("This will never be printed");
}
void loop() {
}
순서 5:
컴파일이 끝나고 업로드 진행 시 ..- .. 계속 진행 할 경우에는
리셋 버튼을 동작합니다.

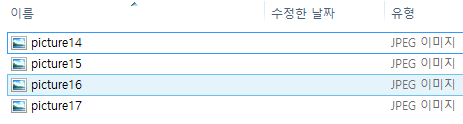
순서 6: GPIO 0점프선을 제거하고 시리얼 포트를 실행합니다.
파일이 생성되고 SD카드에 저장합니다.

순서 7: 리셋 버튼을 실행하면
이미지 파일 명이 picture11.jpg가 됩니다.
순서 8: SD카드를 빼어 pc에서 열람해봅니다.
♥ 다양 한 방법으로 응용하여 봅니다.
'코딩 놀이' 카테고리의 다른 글
| coding 구조 (0) | 2023.05.31 |
|---|---|
| ESP32-CAM, 이미지 메일전송-[5] (0) | 2021.04.05 |
| ESP32-cam -photo 켑췌 [3] (0) | 2021.04.04 |
| ESP32_CAM SD 녹화 -[2] (0) | 2021.04.04 |
| ESP32 -cam 영상보기 -[1] (0) | 2021.04.04 |


